Bouquet of Flowers Bloom Watercolor: Practical Tips for Getting the Most from a 30‑File Hand‑Painted Pack
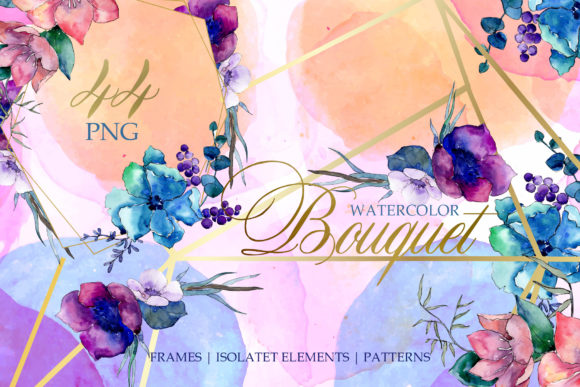
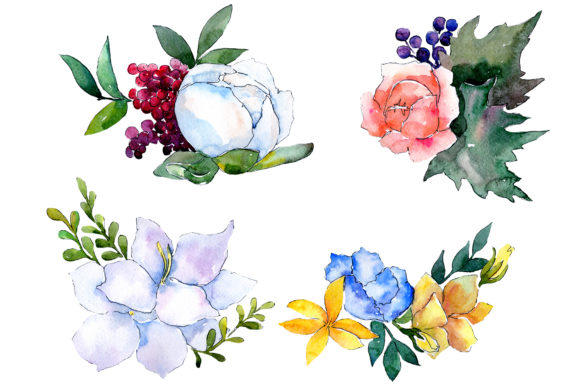
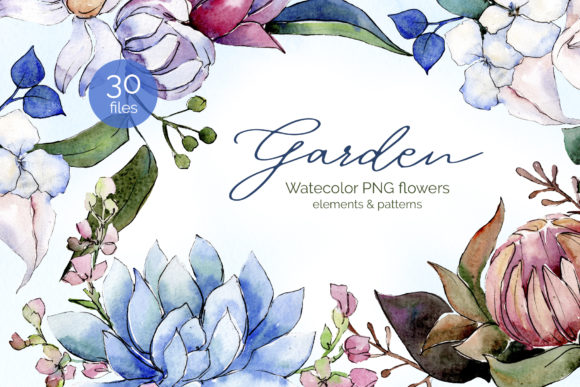
Whether you are designing wedding invitations, crafting greeting cards, creating quote graphics, or building a visual identity for your blog, high‑quality watercolor elements can transform your work. The Bouquet of Flowers Bloom Watercolor pack delivers exactly that: 30 hand‑painted files including bouquets, frames, borders, patterns, and isolated elements, all rendered at 300 dpi with transparent backgrounds (PNG) for the illustrations and 3500×3500 px JPG files for the patterns and frames. This is a versatile resource for DIY enthusiasts, small business owners, freelancers, and anyone who wants polished, professional visuals without starting from scratch.
However, having a beautiful asset pack is only half the story. Many creators overlook key details when using, editing, or applying such files, which can undermine the final outcome. Below we walk through common mistakes, the impact they have on your projects, and how to avoid them so you can get the full value from these watercolor elements.
Mistake #1: Not Checking File Formats Before You Start
A frequent misunderstanding is assuming all files in the pack work the same way. In this collection, the isolated flowers, bouquets, and smaller illustrations are supplied as PNG files with transparent backgrounds — ideal for layering on any surface without a white box. The patterns and frames, however, are JPG files (size 3500×3500 px). JPGs do not have transparency, so if you try to place a pattern over a colored background expecting it to blend seamlessly, you may end up with an unwanted white rectangle around the edges.
How this affects your results
- Layering a JPG pattern over a dark or colored background will show a solid white border unless you carefully mask it in your editing software.
- Using a transparent PNG element in a software that doesn’t support transparency (or forgetting to check the export settings) can cause ugly white halos on the final product.
- Mixing up the formats can waste time and force you to redo work later in the design process.
A better approach
Before opening any file, take five minutes to sort the 30 files into two groups: transparent PNGs (isolated bouquets, individual flowers, small frames, decorative elements) and the JPG patterns/frames. In your design software (Photoshop, Canva, Affinity, Procreate, etc.), test each file type on the background you intend to use. For the JPG patterns, either apply them as overlays with blending modes (like Multiply) or use layer masks if you need them cut out. For the PNGs, confirm that your export settings preserve transparency — especially if you’re outputting to PDF or JPEG for print.
Mistake #2: Overlooking Resolution and Size Flexibility
The pack advertises “fully editable size, colors, etc.”, which is true, but only if you work at a resolution that suits your project. The PNGs are 300 dpi — great for print — but if you scale them up drastically in a low‑resolution canvas, they can become pixelated. Conversely, the JPG patterns are already at 3500×3500 px, which gives you plenty of room for poster‑sized designs, but scaling them down too much can soften the intricate watercolor details.
Impact on quality and professional appearance
- Printing a PNG that you enlarged beyond its native size on a flyer or invitation can result in fuzzy edges that ruin the hand‑painted effect.
- Using the JPG pattern at 100% without adjusting the resolution in your document settings may cause the design to look too large or too busy for small cards.
- Ignoring the dpi of your project (72 dpi for web, 300 dpi for print) can lead to files that look sharp on screen but blurry when printed, or files that are overly large and slow to load on a website.
Practical advice
Always set your document dimensions and resolution before importing any element. For a wedding invitation, create a 5×7 inch canvas at 300 dpi, then place the PNG bouquet and resize it proportionally — typically shrinking the file rather than enlarging it. If you need the element larger than the original, use a dedicated upscaling tool (or “preserve details” in Photoshop) instead of simple stretching. For the JPG patterns, bring them into a new layer at full size, then use a clipping mask or resize with a generous canvas so the pattern remains crisp. Remember: you can always scale down a 3500×3500 px image without quality loss; scaling up a small PNG may degrade the watercolor texture.
Mistake #3: Ignoring the Potential of Isolated Elements vs. Patterns
The pack contains both isolated illustrations (individual bouquets, flowers, and small frames) and repeatable patterns/full frames. A common error is using the complex pattern where a simple isolated element would be more effective, or vice versa. For instance, placing a full 3500×3500 px pattern on a small greeting card can overwhelm the message, while using an isolated bouquet alone might leave a large empty space that feels unfinished.
Why this matters for usability and presentation
- Cluttered designs make text harder to read, which is critical for invitations, quotes, and cards.
- Using an isolated element with no background texture may make the design feel flat or disconnected if you don’t add a subtle backdrop.
- Overusing the pattern as a background can compete with foreground text or other decorative elements, reducing the clarity of your message.
How to choose the right element
Ask yourself: what is the primary purpose of this piece? For a wedding invitation, an isolated bouquet in a corner or at the top can create an elegant focal point, while a soft pattern used at 30–50% opacity as a background adds depth without distraction. For a blog post header, a frame from the pack can neatly enclose your title, and the isolated flowers can be placed around the edges. Test combinations: place an isolated bouquet on a plain white background, then try layering it on top of one of the JPG patterns (using a blending mode) to see which version feels more cohesive. The 30 files give you room to experiment — use that flexibility.
Mistake #4: Forgetting to Edit Colors and Sizes Before Finalizing
“Full editable size, colors, etc.” is a powerful feature, but many creators leave the elements exactly as they come, missing a chance to truly customize them for their brand or project. The watercolor bouquets in this pack are painted in rich, natural tones — but those tones may clash with your wedding color scheme, your logo palette, or the mood of your poster.
What can go wrong
- Sticking with default colors can make your design look generic, even when the artwork itself is high‑quality.
- Not adjusting the size of an isolated bouquet relative to your canvas can throw off the composition — either crowding the text or getting lost in the layout.
- Skipping color editing may also mean you miss an opportunity to unify the design with your brand colors, which matters for small business owners and marketers.
A smarter workflow
In any decent image editor, select the PNG element and use a “hue/saturation” adjustment or “color balance” to shift the tones. For example, you can warm the bouquet for a rustic feel or cool it for an elegant winter invitation. Keep the watercolor texture intact by using adjustment layers rather than painting over the element. For the JPG patterns, you can apply a color overlay (with blending mode) or desaturate and tint them to match your palette. This turns the pack from a generic resource into a custom asset set. Test different color versions on a small sample before committing to the full design.
Mistake #5: Underestimating What to Check Before Buying or Downloading
Even though this is a high‑quality pack, not every resource is right for every project. A few overlooked details can lead to disappointment after purchase.
Checklist before you commit
- File count and variety: The pack contains 30 files — confirm that the mix of bouquets, frames, borders, patterns, and isolated elements matches your project needs. If you need mainly large backgrounds, the JPG patterns (4 files?) and frames will be your focus. If you need single flowers for a wreath design, the PNG isolates are essential.
- Resolution vs. use case: 300 dpi PNGs and 3500×3500 px JPGs are excellent for print and large digital displays. If you only need small web graphics, the files are still usable, but you may want to reduce their size to keep load times quick.
- Transparency and background removal: The PNGs are “without background” — verify that your design software handles transparency properly. Some free tools may not import PNGs with alpha channels correctly, adding a white background automatically.
- License terms: Even though the pack says “ready to print or use for anything you want,” check the specific license (personal vs. commercial) if you plan to sell the end product, such as printed cards or digital templates. This avoids legal headaches later.
- Software compatibility: JPG and PNG are universal, but if you work in a vector‑only environment (e.g., Cricut Design Space for cutting machines), you may need to convert raster images to cut lines — something to factor into your workflow.
Putting It All Together: Ideas for Real Projects
Once you have avoided these common pitfalls, the possibilities truly are extensive. Here are a few concrete ways to apply the pack effectively:
- Wedding invitations: Use an isolated bouquet PNG as the central ornament on a cream background, with text set in a classic serif. Add a soft pattern from the pack at 30% opacity behind the text block for a touch of texture.
- Greeting cards: Choose one of the hand‑painted frames (JPG or PNG depending on your need) and place your message inside. Layer a few small isolated flowers around the frame to create a layered, dimensional look.
- Quote graphics for Instagram or blogs: Place a transparent bouquet PNG on a soft pastel background, then overlay the quote text in a contrasting font. Keep the bouquet off‑center so the text remains readable.
- Posters: Use one of the 3500×3500 px patterns as a full‑bleed background, then add an isolated bouquet and title text on top. The high resolution ensures crisp printing at poster sizes.
- DIY crafts: Print the elements on sticker paper or cardstock. Cut out the isolated flowers and use them for handmade cards, gift tags, or scrapbooking. The 300 dpi ensures clean cuts and vibrant colors.
A Friendly Reminder: Embrace the Hand‑Painted Quality
The strength of the Bouquet of Flowers Bloom Watercolor pack lies in its organic, hand‑painted feel. Unlike vector illustrations, watercolor elements have subtle variations in brushstroke, opacity, and color blending. This is what gives your projects a warm, artistic character. Avoid the urge to “perfect” these elements by sharpening them or adding excessive filters — let the natural aquarelle texture shine. The PNG files preserve this detail beautifully when used at appropriate sizes, and the JPG patterns retain the same painterly quality across large surfaces.
By understanding file formats, respecting resolution boundaries, choosing the right element for each use case, customizing colors thoughtfully, and verifying key details before using the pack, you can elevate every project that touches these files. Whether you are a beginner designing your first wedding invitation or a professional marketer crafting branded visuals, this 30‑file collection offers both the building blocks and the inspiration to create something truly distinctive.