Lama Watercolor: Practical Asset Integration for Design and Print Projects
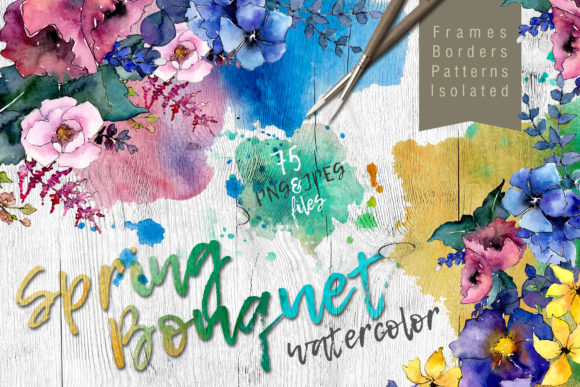
Watercolor elements have become a cornerstone of modern digital design, offering warmth, texture, and organic visual interest that flat vector graphics often lack. The Lama Watercolor collection addresses a specific gap: providing ready-to-use, hand-painted aquarelle components that slot directly into creative workflows without requiring scanning, color correction, or background removal. This pack of four distinct file types—frames, borders, patterns, and isolated illustrations—gives designers, content creators, and small business owners a reliable resource for projects ranging from wedding invitations to blog graphics.
Understanding what these assets are and how they function within a broader production process is essential for getting consistent, professional results. This article walks through the practical aspects of working with Lama Watercolor, from initial preparation to final output, with attention to file handling, compatibility, and long-term reuse.
What the Lama Watercolor Pack Contains and Why It Matters
The collection includes four PNG files at 300 dpi with transparent backgrounds, plus two JPG files for patterns and frames at 3500x3500 pixels. Each illustration is hand-painted, meaning the brush strokes, pigment density, and edge softness vary naturally—something that distinguishes these assets from purely digital replicas.
Breaking down the components:
- Frames – Structural borders that can surround text, images, or other design elements. Useful for certificates, quotes, and formal announcements.
- Borders – Edge treatments that add decorative detail without enclosing content completely. Suitable for stationery, flyers, and social media templates.
- Patterns – Repeatable or standalone background textures. These can fill surfaces behind typography or serve as fabric-like design backdrops.
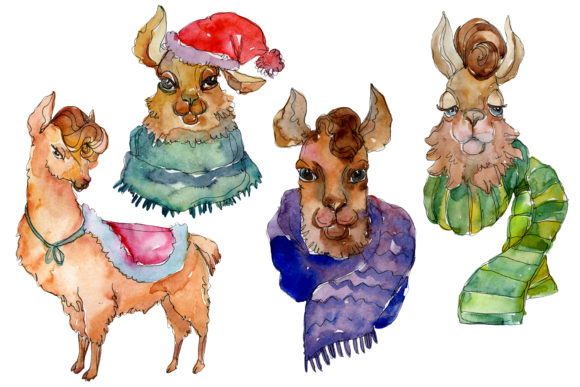
- Isolated illustrations – Individual watercolor motifs (flora, abstract shapes, decorative elements) that can be placed freely within a layout.
Each file is separate, which is a deliberate organizational choice. You are not locked into a single layered composite; you can select, resize, recolor, and combine only what your current project requires. This modular structure supports both rapid prototyping and refined final compositions.
Where Lama Watercolor Fits in a Design Workflow
These assets are most useful during two phases of a project: the assembly stage and the output preparation stage. They are not raw materials that require heavy processing (like scanned paintings that need cleaning), nor are they final print files you simply drop in. They occupy a middle ground—refined enough to use immediately, yet flexible enough to adapt.
Preparation and Setup
Before opening your design software, take a moment to organize the files. The PNGs come with transparent backgrounds, so you can drop them directly onto any canvas without masking. The JPG patterns and frames, while lacking transparency, offer higher resolution (3500x3500px) and are ideal for full-bleed backgrounds or large-format prints.
I recommend creating a dedicated project folder that contains:
- The original Lama Watercolor files (unchanged, as backup)
- A working copy subfolder for adjustments
- A separate exports folder for final outputs
This simple structure prevents accidental overwrites and keeps your workflow repeatable across multiple projects.
Editing and Customization
Because these are raster images (PNG and JPG) rather than vectors, editing is handled through pixel-based or layer-based manipulation. Most design applications—Adobe Photoshop, Affinity Photo, Procreate, Canva, and even GIMP—can open and modify them.
Key adjustments you are likely to perform:
- Resizing – The 300 dpi PNGs scale well down to smaller sizes, but scaling up significantly may introduce softness. Keep originals at their native resolution and only scale within a reasonable range.
- Recoloring – Use adjustment layers (hue/saturation, color balance, or gradient maps) to shift the watercolor tones. Because the brush strokes are translucent, color changes interact with the underlying paper-like texture, preserving the hand-painted feel.
- Combining elements – Stack isolated illustrations over frames or patterns to create custom compositions. The transparent backgrounds make layering seamless.
Integration with Other Assets and Tools
Lama Watercolor works well alongside:
- Typography – Place serif or script fonts inside frames or over pattern backgrounds. Watercolor elements tend to complement softer, handwritten typefaces, but contrast with bold sans-serif headings can also be effective.
- Photographs – Use borders or isolated illustrations as overlays on photos. Reduce opacity or use blend modes (multiply, soft light) to integrate them naturally.
- Solid color blocks – Pattern JPGs can fill shapes or text to create textured color areas.
- Print production – At 300 dpi and 3500x3500px, these files are print-ready for most home and commercial printers. For large format (posters above A2), test a sample at full scale to confirm detail retention.
Practical Implementation by Use Case
Different projects require different approaches to asset selection and arrangement. Here are specific workflows for common applications.
Wedding Invitations
Wedding stationery demands elegance and consistency across multiple pieces (save-the-date, invitation, RSVP card, details insert). Use the frame PNG as the primary anchor for invitation text. Select one pattern JPG as a consistent background for all enclosures to create visual cohesion. Add isolated floral illustrations sparingly—one motif per piece, placed at a corner or along a fold line.
Workflow example:
- Open the frame PNG in your design software and center your invitation text inside it.
- Apply the pattern JPG as a background layer behind the frame, adjusting opacity to 20–40 percent so it does not compete with the frame.
- Place one isolated illustration (e.g., a small watercolor bloom) near the date or venue information.
- Export as PDF for print or as high-resolution PNG for digital distribution.
Greeting Cards
Greeting cards benefit from strong focal points. The isolated illustrations work well as central images, especially when enlarged to fill most of the card face. Alternatively, use a border element to frame a short message, leaving the center empty for handwritten notes.
Because greeting cards often come in standard sizes (5x7 inches, A6), resizing the assets to fit the canvas is straightforward. Keep the PNG at 300 dpi; if your canvas is smaller than the original file dimensions, scale the asset down rather than cropping aggressively to preserve brush detail.
Blog Graphics and Social Media
For digital content, file size matters less than visual clarity and load speed. The PNGs, while high resolution, can be exported as smaller web-friendly versions (150 dpi, compressed quality) without losing the hand-painted character. Use patterns as blog post backgrounds or as dividers between sections. Frames work well for quote graphics—place the frame behind a short text block and export as a single image for Instagram, Pinterest, or featured images.
A practical tip: create a reusable template in your design tool that includes a frame and a preferred pattern layer. Each week, swap out the isolated illustration and text to generate fresh content quickly.
Posters and Wall Art
Large-format printing requires asset files that hold up at scale. The JPG patterns and frames at 3500x3500 pixels are your primary resources here. For a 12x18 inch poster at 300 dpi, you need approximately 3600x5400 pixels total, meaning the pattern JPG covers about two-thirds of that area. You can tile the pattern or pair it with a frame that fits within the poster’s safe zone.
Test your layout at actual print size in your software to ensure the watercolor textures do not become pixelated. If you need to extend a pattern, duplicate the JPG layer and align edges carefully—some patterns are designed to repeat, but confirm visually before committing to a large run.
Quality Control and Consistency
When working with hand-painted assets, variability is both a feature and a consideration. No two brush strokes are identical, which gives your designs an authentic handcrafted feel. However, if you need multiple pieces (like a set of 50 invitations) to look identical, use the same file across all pieces rather than recoloring or repositioning each one separately.
Run a color consistency check if you are adjusting hues. Watercolor images have subtle shifts in saturation and value across different areas of the brush stroke. Apply color changes to the entire file, not to selective sections, unless you want a multi-toned effect.
For print projects, request a sample from your printer before producing the full batch. Screen color and printed color can differ significantly, especially with translucent watercolor textures.
Long-Term Reuse and Organization
One of the strongest advantages of the Lama Watercolor pack is its reusability. Because each file is separated and requires no background removal, you can build a personal library of variations over time by saving edited versions with different colors or scales. Tag your files with descriptive names (e.g., “Lama_BlueFrame_Soft”) so you can locate them quickly in future projects.
Consider creating a master template document in your design software that contains all four assets in a single file, each on its own layer. This gives you a starting point for any new project. Duplicate the template, then hide or modify layers as needed. This approach reduces file hopping and keeps your process efficient.
If you work across multiple devices or with a team, store the original files in a shared cloud folder with read-only access for team members. Establish naming conventions early to avoid version confusion.
Final Observations on Workflow Integration
Lama Watercolor assets are most effective when treated as modular components within a structured design process. They are not standalone solutions but rather building blocks that combine with typography, photography, and layout decisions. Their value comes from reducing manual preparation time—no scanning, no background cleanup, no resolution guesswork—so you can focus on composition and messaging.
Whether you are producing a single greeting card or a commercial order of wedding stationery, these files give you a consistent starting point. The hand-painted quality ensures your projects carry an organic, tactile dimension that digital-first designs often lack. By understanding how to prepare, edit, combine, and output these assets, you can integrate them into your regular workflow with minimal friction and maximum creative flexibility.