Tropical Jungle Watercolor: A Complete Guide to Using Hand-Painted Art for Your Creative Projects
If you have ever searched for tropical jungle watercolor graphics, you already know the market is full of options. Some are stunning. Others look like they were painted by someone who has never actually seen a palm frond. The difference between a project that looks polished and one that feels flat often comes down to the quality of your source material and how you use it. A well-crafted tropical jungle watercolor set, especially one that includes PNG clipart files with transparent backgrounds and high-resolution JPG patterns, can save you hours of work and elevate your design from amateur to professional. But only if you know what to look for and what to avoid.
What Makes a Tropical Jungle Watercolor Set Worth Your Time
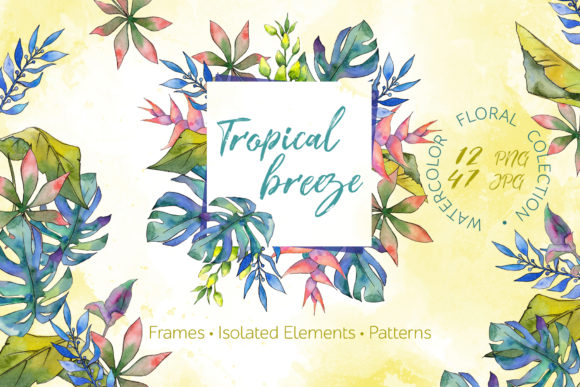
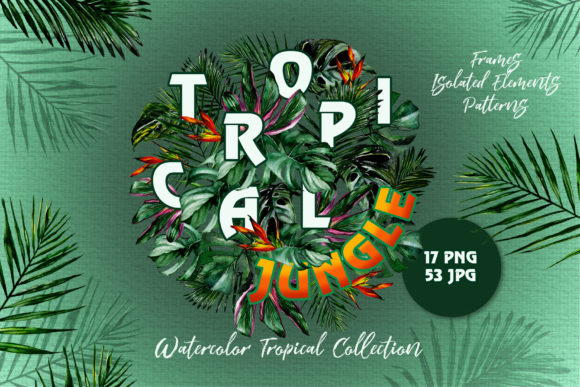
A strong tropical jungle watercolor pack is not just a collection of pretty leaves. It is a toolkit. When a set contains 70 files, with 17 PNG files and 53 JPG files, you are getting more than isolated elements. You are getting frames, borders, patterns, and standalone illustrations that can be mixed and matched. The fact that each image is hand-painted and delivered as a separate file at 300 dpi changes how you can use them. You are not limited to a single composition. You can layer, rotate, scale, and recolor elements without losing detail. That kind of flexibility matters whether you are designing wedding invitations, building a brand for your blog, or creating greeting cards for a small business.
The most overlooked detail in these packs is the resolution of the JPG files. When a pattern or frame is offered at 3500x3500 pixels, you are looking at a file that can be printed large without pixelation. Many people buy smaller packs and then wonder why their poster looks blurry. The answer is resolution. Always check the pixel dimensions of the background textures and patterns before you start a project that will be printed at any size beyond a standard card.
Mistake One: Treating Every Element as a Final Product
The most frequent error I see is someone downloading a tropical jungle watercolor set and using the elements exactly as they are, without any adjustment. They place a palm leaf on a white background, add some text, and call it done. That approach works in a pinch, but it ignores the real strength of watercolor art. Because these graphics are hand-painted, they have natural variation in opacity, texture, and edge softness. If you drop them onto a white square without any shadow, blending, or layering, they can look like stickers rather than part of the design.
A better approach is to use the PNG files with their transparent backgrounds to build depth. Layer a large-scale watercolor pattern from the JPG files as your background. Then place isolated elements on top, slightly overlapping. Adjust the opacity of the background pattern so it sits behind your main subject softly. This creates a cohesive look that feels painted, not pasted. For wedding invitations, this technique makes the difference between a design that looks custom and one that looks templated.
Mistake Two: Ignoring the JPG Patterns and Frames
Many buyers focus only on the PNG clipart files because those are the ones with transparent backgrounds. They skip the JPG patterns and frames entirely. This is a missed opportunity. The JPG files in a pack like this are 3500x3500 pixels and are designed to be used as full backgrounds, borders, or texture overlays. If you are designing a poster or a blog header, a seamless watercolor pattern can be the foundation of your layout. You can then place your PNG elements on top, creating a layered composition that looks rich and intentional.
A practical example: suppose you are making a greeting card for a tropical-themed event. Use a JPG frame from the pack as the outer border of your card. Then place a few isolated PNG leaves and flowers inside the frame. Because the frame already has watercolor texture, the whole card feels cohesive. You avoid the problem of a flat white background that makes everything look disconnected.
Mistake Three: Overlooking Editable Size and Color Flexibility
One of the most misunderstood features of high-quality watercolor clipart is that it is fully editable in size and color. Because the files are 300 dpi and the PNGs have no background, you can scale them up or down without losing sharpness. You can also change the hue, saturation, or even recolor entire elements in your design software. Yet many users leave the colors exactly as they came, even when those colors clash with their project palette.
If you are designing wedding invitations with a specific color scheme, do not be afraid to adjust the watercolor elements. A set of tropical jungle watercolor leaves that originally leans toward bright green can be shifted to a muted sage or a deep emerald with a few adjustments in your editing software. The same goes for flowers or accent elements. The hand-painted quality remains, but the colors match your brand or event theme. Ignoring this flexibility is like buying a set of paints and only using the colors straight out of the tube.
Mistake Four: Forgetting That These Files Are Ready to Print
There is a common misunderstanding that watercolor clipart is only for digital use. The 300 dpi resolution and the large JPG dimensions mean these files are ready for print from the moment you download them. You can use them for posters, flyers, product packaging, or even fabric transfer projects. But you need to set your document correctly. If you place a 3500x3500 pixel pattern into a document that is 72 dpi, you will not see the problem until you try to print it. The image will look fine on screen but soft on paper.
Always set your document to 300 dpi before importing any of the JPG files. For the PNG clipart, because they are already 300 dpi, scaling them down is safe, but scaling them up too much will eventually show pixelation. The rule is simple: keep the PNGs at or below their original size for the best print quality. For digital use, you can size them however you like.
What to Check Before You Buy or Download
Before you invest time or money into a tropical jungle watercolor pack, look at a few key details. First, confirm that the files are separated. A pack that offers every element on a single sheet may seem convenient, but it severely limits your editing options. You want each leaf, flower, frame, and border in its own file. That is what gives you the freedom to arrange and resize.
Second, check the file format. PNG files without a background are essential for layering. JPG files for patterns and frames are useful, but make sure the JPGs are high resolution. 3500x3500 pixels at 300 dpi is a strong indicator of quality. Anything smaller may limit your print options. Also look at the variety of elements. A good set should include not just leaves but also flowers, branches, frames, borders, and at least one or two full patterns. This variety saves you from having to buy multiple packs for one project.
Third, examine the painting style. Hand-painted watercolor has natural irregularities. That is part of its charm. But if the edges are too soft or the colors are muddy, the elements will not layer well. Look for samples that show clean edges on the PNG files and clear detail on the JPG patterns. If you can see the texture of the paper or brush strokes in the sample images, that is a good sign. It means the art is genuine watercolor, not a digital imitation.
Practical Ways to Use Tropical Jungle Watercolor in Real Projects
For DIY wedding invitations, start with a watercolor pattern JPG as your background. Place a frame from the pack in the center. Inside the frame, arrange a few isolated leaves and flowers from the PNG files. Add your text in a clean serif or script font. The watercolor texture will give the invitation a romantic, handcrafted feel without requiring any painting skills.
For greeting cards, use a single large watercolor leaf or flower as the central image. Place it off-center and let the edges fade naturally. Add a short message next to it. Because the background is transparent on the PNG, you can place the element on any colored paper or digital background. If you are selling cards on a platform like Etsy, this approach keeps your production simple while delivering a product that looks bespoke.
For blog headers or social media graphics, layer a pattern JPG at reduced opacity as your background. Place isolated elements on top, then add your title. The watercolor texture adds warmth and personality to an otherwise flat digital design. This is especially effective for lifestyle blogs, travel content, or creative business pages.
For posters or wall art, the 3500x3500 pixel JPG patterns can be printed at sizes up to 12x12 inches at 300 dpi without any loss of quality. You can print them as standalone art or combine them with PNG elements to create a custom composition. Because the files are hand-painted, the final print will have the subtle variations in color and texture that make watercolor so appealing.
Final Thoughts on Choosing and Using Watercolor Clipart
The best tropical jungle watercolor pack is one that gives you room to create, not one that locks you into a single layout. When you have 70 separate files, including 17 PNGs with transparent backgrounds and 53 high-resolution JPGs, you have a library of possibilities. The mistakes happen when people treat these graphics as finished products rather than raw materials. Edit the colors. Layer the elements. Use the patterns as backgrounds and the frames as boundaries. Test the resolution before you commit to a large print. And always check the file format and dpi before you buy.
With the right approach, a set of hand-painted watercolor elements can carry you through dozens of projects, from invitations to branding to home decor. The effort you put into understanding the files upfront will save you time, frustration, and wasted materials later. That is the difference between a project that works and one that truly stands out.